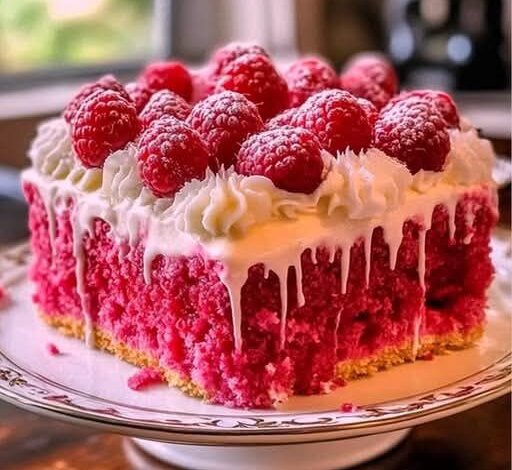
Raspberry Zinger Poke Cake
Servings: 12–15 | Pan size: 9×13 inches
Ingredients
For the Cake:
- 1 box (15–18 oz) white or yellow cake mix
- Eggs, oil, and water (as directed on the cake mix box)
For the Raspberry Gelatin Mixture:
- 1 (3 oz) box raspberry-flavored gelatin
- 1 cup boiling water
- ½ cup cold water
For the Topping:
- 1 (8 oz) container whipped topping, thawed
- 1 (12 oz) package fresh or frozen raspberries (if frozen, thaw first)
- Optional garnishes: mint leaves or powdered sugar
Instructions
1. Prepare and Bake the Cake
- Preheat your oven to 350°F (175°C). Grease a 9×13-inch baking pan lightly with butter or nonstick spray.
- Prepare the cake batter according to the instructions on the package, using the specified eggs, oil, and water.
- Pour the batter into the prepared pan, spreading it evenly.
- Bake for 28–32 minutes, or until a toothpick inserted into the center comes out clean.
- Allow the cake to cool slightly in the pan. The cake should remain warm, as this helps it absorb the gelatin more effectively.
2. Make the Raspberry Gelatin
- In a medium bowl, dissolve the raspberry gelatin powder in 1 cup of boiling water, stirring until completely dissolved.
- Stir in ½ cup of cold water to cool the mixture slightly and combine well.
3. Poke the Cake and Add Gelatin
- Use the end of a wooden spoon, skewer, or similar tool to poke holes evenly across the surface of the warm cake (around 20 holes works well).
- Slowly pour the prepared raspberry gelatin over the cake, letting it seep into the holes.
- Let the cake sit at room temperature until fully cooled, or refrigerate to speed up the process.
4. Add Whipped Topping and Berries
- Once cooled, spread the thawed whipped topping evenly over the top of the cake.
- Gently press or scatter the raspberries over the whipped topping.
5. Optional Garnish and Serving
- Decorate with fresh mint leaves or a light dusting of powdered sugar if desired.
- Chill the cake until ready to serve.
This version emphasizes clarity, makes each step easy to follow, and separates the components cleanly for beginners or experienced bakers alike.