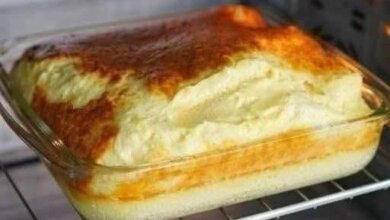
I Whipped a Freezing-Cold Can of Evaporated Milk Instead of Heavy Cream—10 Minutes Later, This Happened


I Whipped a Freezing-Cold Can of Evaporated Milk Instead of Heavy Cream—10 Minutes Later, This Happened
Heavy whipping cream is the classic choice when you want a rich, fluffy whipped topping. But what happens when you don’t have heavy cream and reach for a can of evaporated milk instead?
That was exactly the question behind my little kitchen experiment.
I had a can of evaporated milk in the pantry and wondered whether getting it extremely cold would make it behave more like heavy cream. So I chilled the milk, cooled my mixing equipment, and spent the next ten minutes whipping it.
The result was surprisingly interesting—and there are a few important tricks that make a huge difference.
1. Why I Reached for Evaporated Milk Instead of Heavy Cream
The experiment started out of simple necessity.
Heavy cream contains considerably more fat than evaporated milk, and that fat is what normally helps heavy cream form and hold a stable whipped structure.
Evaporated milk, on the other hand, is concentrated milk. Some of its water has been removed during processing, giving it a thicker consistency and a slightly richer flavor than ordinary milk.
It isn’t naturally designed to become whipped cream.
Still, I wondered whether extreme chilling could compensate, at least partially, for the lower fat content.
There was only one way to find out.
2. The Exact Setup
I started with:
1 can evaporated milk, chilled
2–3 tablespoons powdered sugar, optional
1 teaspoon vanilla extract, optional
A large mixing bowl
Electric hand mixer or stand mixer
Whisk attachment
I placed the unopened can in the freezer for about 30 minutes.
I didn’t want the milk to freeze solid. The goal was simply to make it extremely cold.
I also put my mixing bowl and beaters in the freezer for roughly 10–15 minutes.
That cold equipment matters because warm utensils can quickly raise the temperature of the milk while you’re whipping it.
Important: Don’t leave a sealed can in the freezer for an extended period. Liquid expands when it freezes, which can damage the can.
3. I Opened the Can and Started Whipping
After chilling, I opened the can and poured the evaporated milk into the cold mixing bowl.
At first, nothing particularly exciting happened.
The milk simply became frothy.
I started the mixer on low speed, then gradually increased it to medium-high.
After a couple of minutes, the liquid had incorporated quite a bit of air and looked noticeably lighter.
It wasn’t anything like traditional whipped cream yet, but there was definitely a change happening.
4. Around the Five-Minute Mark, Things Started Looking Different
After several minutes of whipping, the evaporated milk had become much thicker and fluffier.
The volume had increased considerably.
This was the moment when I realized the experiment wasn’t a complete failure.
The mixture looked almost like a very light mousse.
However, there was an important difference from heavy cream:
The foam wasn’t as firm or rich.
Traditional whipped cream gets much of its structure from milk fat. Evaporated milk simply doesn’t contain enough fat to behave exactly the same way.
Still, the transformation was impressive.
5. The Ten-Minute Result
After about ten minutes of whipping, the evaporated milk had become airy, fluffy, and significantly thicker than when I started.
It could hold soft peaks for a short time.
Adding a little powdered sugar and vanilla made it taste much more like a dessert topping.
The texture was lighter than whipped cream, almost somewhere between a foamy whipped topping and a delicate mousse.
And that’s when I discovered the biggest limitation of the experiment:
It doesn’t stay whipped forever.
After sitting at room temperature, the mixture gradually began losing some of its volume.
That’s completely understandable. Evaporated milk doesn’t have the same fat structure needed to stabilize traditional whipped cream.
6. The Secret Is Temperature
If there’s one lesson from this experiment, it’s that cold is absolutely essential.
Evaporated milk needs to be very cold before whipping.
The colder the milk and equipment, the easier it is to incorporate and temporarily hold air.
If the milk is merely refrigerator-cold and your bowl is warm, you may get little more than bubbles and foam.
For the best result:
Chill the unopened can briefly.
Chill your bowl.
Chill your beaters.
Work quickly.
Whip immediately after opening the can.
Keep the finished topping refrigerated.
7. Can You Add Sugar and Vanilla?
Absolutely.
For a sweeter dessert topping, I like adding:
2–3 tablespoons powdered sugar
1 teaspoon vanilla extract
Powdered sugar works particularly well because it dissolves easily.
You can also adjust the sweetness depending on what you’re serving it with.
For fruit, pancakes, waffles, or cake, a lightly sweetened version works beautifully.
8. What About Regular Granulated Sugar?
You can use it, but powdered sugar is generally more convenient.
Granulated sugar may take longer to dissolve and can leave a slightly gritty texture if added too late.
If granulated sugar is all you have, add a small amount while whipping so it has time to dissolve.
9. Can Evaporated Milk Replace Heavy Cream in Every Recipe?
No.
This is probably the most important takeaway.
Whipped evaporated milk can make a useful light topping, but it isn’t a one-for-one replacement for heavy whipping cream.
Heavy cream contains much more fat, which allows it to whip into a richer, denser, and more stable foam.
Evaporated milk contains significantly less fat, so its whipped texture is more delicate.
That means this trick is best for situations where you want something light and fluffy rather than an exact copy of whipped cream.
10. Where This Trick Works Best
Once whipped, evaporated milk can be used as a topping for:
Fresh berries
Fruit salad
Pancakes
Waffles
French toast
Hot chocolate
Cakes
Pies
Pudding
Ice cream
Brownies
Dessert cups
It’s particularly useful when you’re missing heavy cream but still want something creamy and airy on top of dessert.
11. Why It Works at All
The science behind it is actually pretty simple.
Whipping forces tiny air bubbles into the liquid.
Milk proteins can help surround those air bubbles and temporarily stabilize them.
With heavy cream, milk fat plays a major role in creating a stable whipped structure.
Evaporated milk doesn’t have that same high fat content, but because it is concentrated and very cold, its proteins can still help create a temporary foam.
That’s why the result is possible—but less stable.
12. One More Trick for a More Stable Topping
If you want the whipped evaporated milk to hold its shape a little longer, you can experiment with a small amount of gelatin.
A properly prepared gelatin mixture can help stabilize the foam.
However, this changes the texture and isn’t necessary if you’re simply making a topping that will be served immediately.
For a quick dessert, cold evaporated milk + cold equipment + powdered sugar + vanilla is the simplest approach.
13. The Final Verdict
So, did evaporated milk magically become heavy whipping cream?
No.
But did it turn into a surprisingly fluffy and usable dessert topping?
Yes.
The experiment showed that evaporated milk can be whipped when it’s extremely cold, producing a light and airy texture.
It won’t have the richness or long-lasting stability of traditional whipped cream, but when you’re out of heavy cream, it’s a clever pantry trick worth remembering.
The biggest lesson is simple:
Don’t underestimate what a very cold can of evaporated milk can do.
Sometimes the best kitchen discoveries happen when you don’t have the ingredient you’re supposed to use—and decide to experiment with what you already have.